
How to Use an IKEA Greenhouse (Setup, Tips & Common Mistakes)
So, you’ve taken the exciting step to make an IKEA greenhouse cabinet—congrats! But how do you turn that beautiful DIY setup into a thriving, low-maintenance haven for your plants? Here’s your comprehensive guide to setup, daily care, avoiding pitfalls, and arranging shelves like a pro!
Initial Setup Tips
Getting your greenhouse cabinet set up right at the start makes all the difference. Here's what community members highlight as top priorities:
- Choose the placement wisely: Pick a spot with indirect daylight and accessible outlets. If you can't get natural light in, just set up your grow lights on a timer.
- Rust-proof and clean cracks: Before adding plants, consider rust-proofing edges or cleaning all seams—especially if you drilled any holes for cables. A common practice is to spray Rustoleum on all metal parts prior to assembly to prevent rust creep in over time.
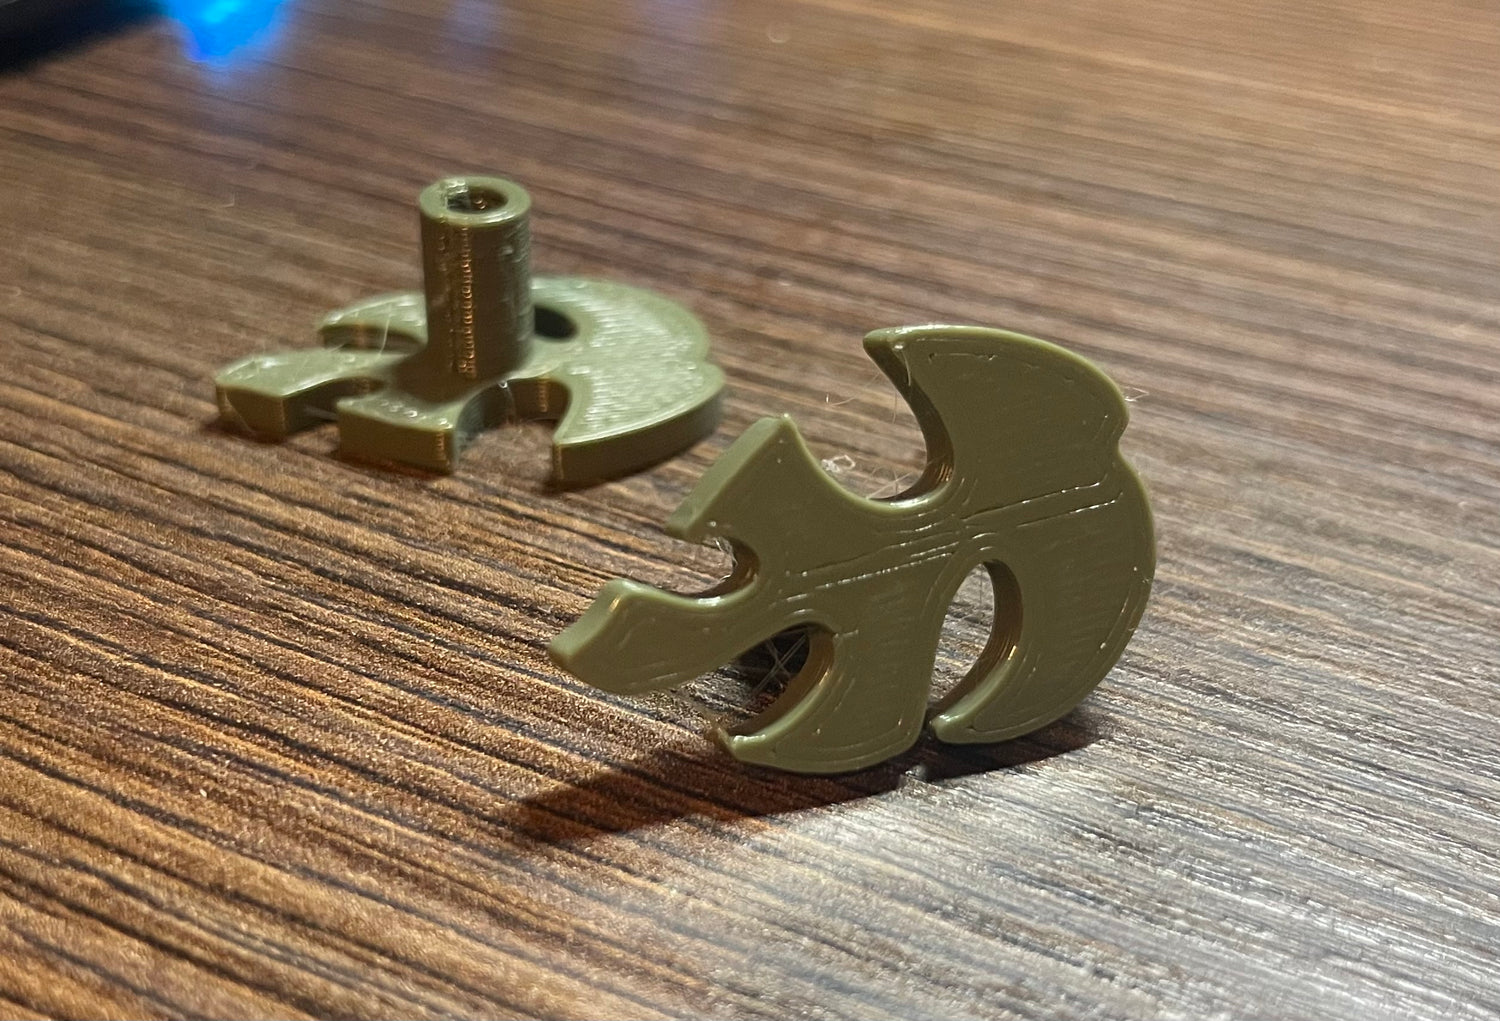
- Drill your cable hole now: Doing it early avoids glass misalignment later. Use a proper hole saw, protect edges with tape or grommets, and plan out the plug/cable routing. Plantal Support's Pain-Free Upgrades provides you with the rubber grommet for a 50mm (2 inch) hole to keep the math simple!
- Seal for humidity: Weather-stripping foam all around the doors (and even hinges) keeps humidity locked in—most growers hit 60–80% just from plant transpiration!
Daily Maintenance (Light, Water, Ventilation)
Once your greenhouse cabinet is assembled, here’s how to keep it happy:
Lighting
- Use full-spectrum LED strips (like Barrina) mounted with adhesive brackets or magnets—these last, daisy-chainable lights keep things evenly lit.

Watering
- Skip overwatering! Here's a trick: fill pots halfway, let them “butt-chug” for about 15 minutes, then dump the excess. Keeps soil moist but not swampy.
- Avoid standing water by removing plants for watering or using trays. It cuts humidity spikes and keeps the base dry.
Airflow
- Gentle circulation is key. Install USB fans on every shelf level using magnets or zip ties, set on low. Good airflow prevents mold and keeps humidity in balance.

- To save on the energy cost and avoid using large amount of fans, custom made acrylic shelves with cutouts are ideal for keeping the ventilation going and humidity even.
Humidity Monitoring
- A hygrometer helps dial in your levels. Alert your setup if humidity dips below 70% or climbs past 85%.
- In most cases, plants plus sealing = stable humidity. In drier climates or winter, add a pebble tray or small humidifier—but often it's unnecessary if your greenhouse is full of plants and properly sealed.
Common Mistakes to Avoid
Even the best setups can run into issues. Here are common traps and how to sidestep them:
- Overcrowding: Too many plants block airflow and light. We recommend odd shape shelves or shelving with cutouts instead of solid glass to keep breezes flowing.
- Skipping ventilation: Not running fans invites mold and fungal issues.
- Ignoring cord safety: Reacting later—especially around water—can cause messy wiring. Drill early, use grommets, and plan your outlets.
- Using alcohol-based cleaners on acrylic shelves: They can micro-scratch the surface—stick to gentle glass or acrylic-safe cleaners.
- Letting rust set in: Without sealing or paint, drilled metal edges can rust over time. Preempt that with sealant or protective spray.
Best Practices for Shelf Arrangement

How you arrange your shelves affects plant health and beauty:
- Place taller plants on the bottom shelf and shorter or trailing ones higher up to maximize space and light flow.
- Leave space behind fans for proper air intake.
- Go for wire or ventilated acrylic shelves so light and airflow reach every level.
- Consider staging your shelves in clusters—visual variation helps display and microclimate control. For more shelf strategies, check out our full guide: IKEA Greenhouse Shelves Guide